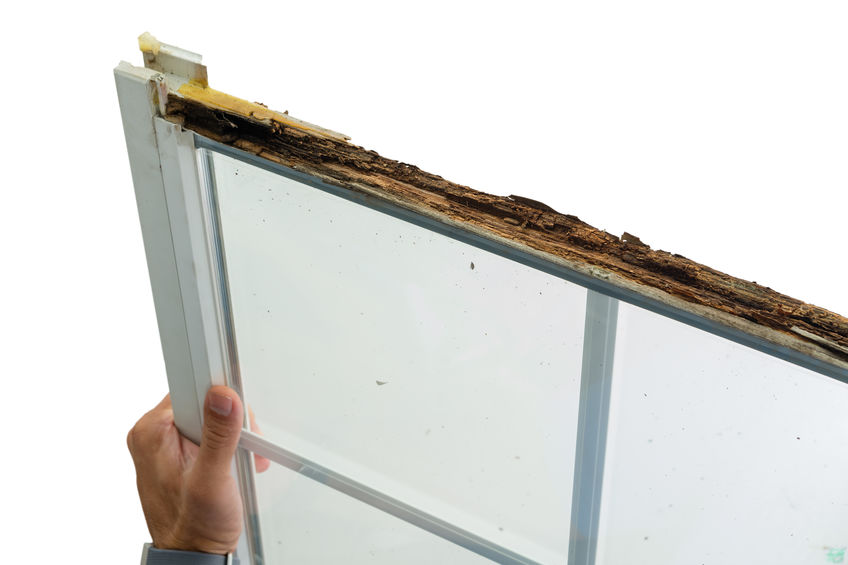
- Assess the Damage
The most common signs of rot include large cracks on the surface and missing parts of wood that might have crumbled away over time. However, not all rot on wooden window frames is visible as they could be hidden under the sill or behind an outer façade of the strong wood.

The best way to assess the damage on your wooden window frame is to probe it with a flat-head screwdriver. A rot that is confined to the outer frame or the sill is repairable. However, you may consider replacing the entire frame if the rot affects the window frame itself and the interior casement.
- Remove the Rotten Materials
Once you have assessed the extent of damage and found that your window frame is repairable, the next step is to get rid of the rotten wood. Use a screwdriver or knife to scrape it out or cut off the affected pieces. Get rid of as much crumbling wood as possible by digging deeply enough until the healthy parts of the wooden window frame are revealed. A lot of rot collects between adjoining pieces of wood, so curving out the affected area provides enough room to repair. Afterward, clean away the debris by scrubbing the surface with a brush.
- Drill Holes and Apply Epoxy Wood Consolidant
Drill small holes into the healthy wood frame left using a quarter-inch bit. Space the holes evenly about an inch apart so that the fillers can hold securely onto the wood. Get rid of any dust or debris on the frame before preparing the consolidant. Follow the manufacturer’s instructions when applying epoxy wood consolidant to the affected area. Fill all drilled holes with the consolidant and allow some time for it to be absorbed into the wood before applying the second coat.
- Apply the Filler
Adding a thin layer of epoxy consolidant strengthens the wood before you can apply filler. The filler restores the window frame to its original dimensions to make the repair complete. Apply the filler on the affected area and mold it to conform to the shape of the window frame. Press the filler firmly into the area using a putty knife and allow the filler to dry. You can also check the manufacturer’s recommendations to ensure you are allowing enough time for the filler to dry. The filler can be mixed with a hardener to dry quickly so that you do not have to wait longer.
- Smooth Out the Repair
After the filler has dried, smooth out the surface using rough-grit sandpaper or a sanding block. This helps to level the hardened filler with the surrounding wood area. When sanding down the surface, remember to wipe away the dust and wood remnants with a dry rag. Smoothing out the repair helps to restore the original dimensions of the entire window frame and ensure nothing interferes with your final finishes.
- Prime and Paint
If you intend to paint the entire window frame after the repair, you need to prime the surface with a primer. Use a paintbrush to apply the primer, taking into account the manufacturer’s recommendations on product preparation and application. Use a paintbrush to apply the primer evenly over the area and allow some time for it to dry. Afterward, you can apply one to three coats of paint based on the results you intend to achieve.
Consider painting the entire window frame to create a uniform look. Watch out for running spills so that you do not interfere with the color of your walls. Allow some time for the first coat to dry completely before applying the next coat based on your intended results.
Rot and decay can damage your window frames and interfere with the level of insulation and overall appearance of your home. Addressing this problem as soon as possible can save you a lot of money on energy bills and expensive repairs. If you are not sure about the extent of the rot, consider seeking help from a professional as they have the necessary skills and experience to handle different kinds of window frame repairs.
